Large format tile is the dominant request we get for new bathroom and kitchen work in Spring Lake, Bay Head, Manasquan, and the rest of the Monmouth and Ocean County shoreline. Homeowners see the 24x48 porcelain slabs in design magazines, the 30x60 slab walls in the Restoration Hardware catalog, the floor-to-ceiling marble-look porcelain at the Hamptons showroom, and they want it. We agree the look is hard to beat. The work to deliver it correctly is also hard to fake, which is why most of the failed large-format jobs we get called in to fix were installed by contractors who treated the material the same way they would treat a 12x12 floor tile.
The format is unforgiving. Lippage shows. A 1/32-inch high spot on the substrate becomes a visible ridge across two feet of tile. Bond failures show up six months later as hollow-sounding pops underfoot. Cuts have to be exact because there are no small pieces to lose mistakes in. This is the post we wish every homeowner read before signing a contract for large-format work in a shore-area home. The information applies whether you hire JL Tile & Stone or another installer. The point is to know what the work actually involves.
What Counts as Large Format Tile?
The industry definition: any tile where one edge is 15 inches or longer is large format. By that standard, 18x18 floor tile is large format. In practice, the format that creates the install challenges is 24-inch-and-larger on the short edge. The popular sizes in current shore-area projects:
- 24x48 porcelain. The current default for primary bathroom floors and shower walls. Manageable to handle, two-person install, fits most residential bathrooms with minimal cuts.
- 30x60 porcelain. Used for shower walls and feature walls. Looks like a single slab once installed. Requires careful lifting and a leveling system on every joint.
- 48x48 and 48x108 slab tile. The "gauged porcelain panel" category. Effectively a slab of porcelain replacing what would have been a slab of natural stone. Two people minimum, often three, and specialized cutting equipment.
- 60x120 and larger. Specialty installs. Usually feature walls, fireplaces, or commercial. Residential installs at this size require a crew, a vacuum suction frame, and a careful site survey before the tile is even ordered.
Format drives method. The difference between installing a 12x12 ceramic and a 24x48 porcelain is not just size. It is substrate prep, mortar selection, layout planning, cutting tools, lifting equipment, leveling system, and crew size. A contractor who quotes both jobs the same way is missing things.
Why Large Format Tile Fails: The Five Problems Most Installers Skip
The patterns we see when called in to look at failed large-format work in Monmouth and Ocean County homes:
1. Substrate flatness
For tile with edges 15 inches or longer, the Tile Council of North America (TCNA) standard requires the substrate to be flat to within 1/8 inch over 10 feet, and within 1/16 inch over 24 inches. Translation: the floor or wall has to be almost dead flat. A typical residential subfloor in a 1980s Brick or Toms River home is not. Joists deflect, plywood has crowns and dips, and a quick visual check with a 4-foot level will show the high and low spots. A real large-format install requires self-leveling underlayment on floors or a skim coat of mortar on walls to bring the surface inside spec before any tile is set. Most failed installs we see skipped this step because it adds a day and a few hundred dollars to the job. The result is lippage that the homeowner sees from the doorway every morning.
2. Mortar coverage
Large format tile requires 95 percent mortar coverage on wet installs (showers, tub surrounds, exterior) and 80 percent on dry installs (kitchen floors, dry walls). Hitting that coverage with a 24x48 tile requires backbuttering. The installer puts thinset on the substrate with a 1/2-inch square-notch trowel, then puts a thin skim coat of thinset on the back of the tile, then sets and beats the tile in with a rubber mallet to collapse the ridges. If the installer skips backbuttering, the coverage is 60 to 70 percent on a good day and 40 percent on a rushed one. The hollow spots are where the tile cracks under load in year two.
3. Mortar selection
Standard modified thinset (the kind that comes in a typical 50-pound bag) is wrong for large format porcelain. The TCNA spec calls for a Large and Heavy Tile (LHT) mortar, formerly called medium-bed mortar. LHT has more body, will not sag under the weight of a 30x60 tile on a wall, and bonds reliably to dense porcelain bodies that standard thinset slides off of. If a contractor opens a bag labeled "thinset" and starts spreading it without mentioning the format, ask what the bag says. If it does not say "Large Format," "LHT," or "Medium Bed," it is the wrong product for the job.
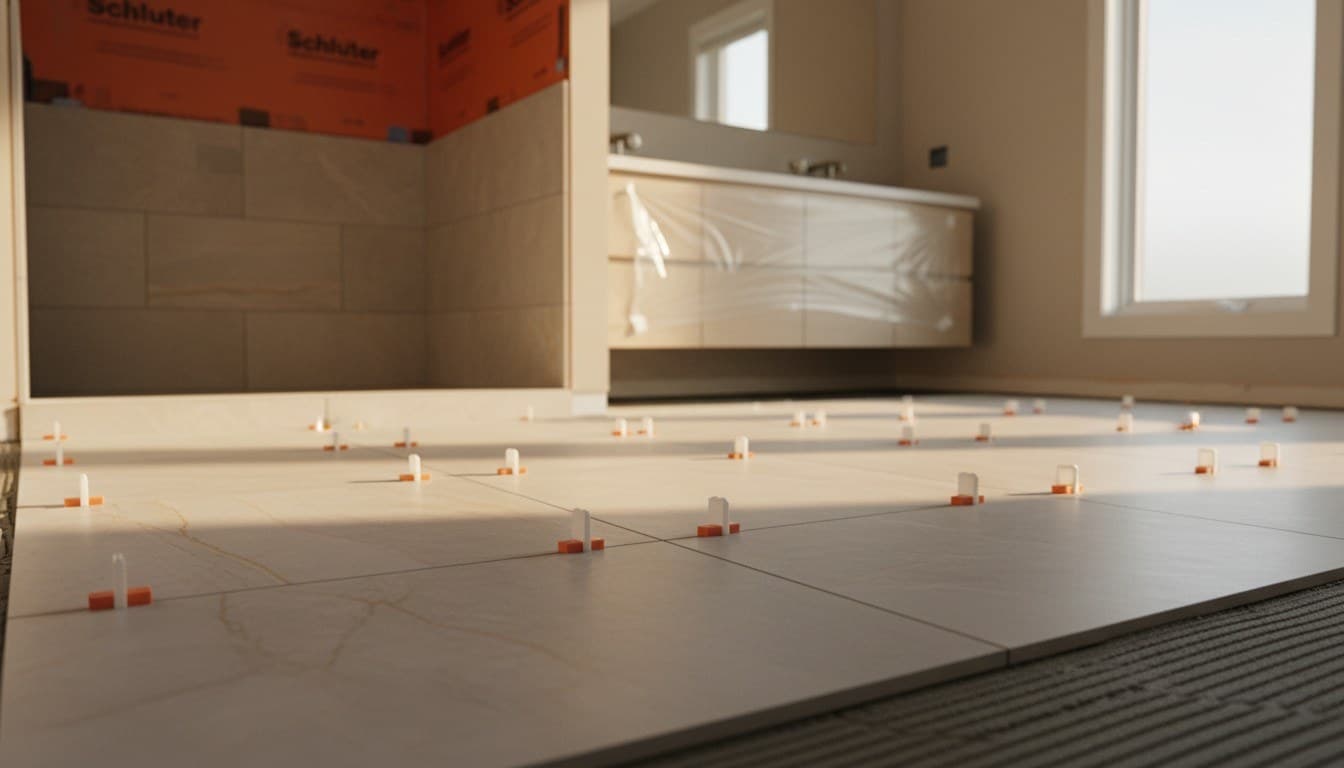
4. Leveling systems
Manual leveling with spacers is not enough on tile this size. A proper large-format install uses a tile leveling system: plastic clips that go under the edge of one tile and the next, a wedge that locks the two tiles flush, and a torque-controlled tool to set the wedge to a consistent pressure. Without leveling clips, the installer is trying to eyeball lippage across a 4-foot edge while gravity pulls the tile out of plane. The result on any wall install is wavy joints and visible edges. On a floor, it is the start of every barefoot lippage complaint we get.
5. Layout planning before the first tile is set
A 12x12 install hides layout mistakes inside small pieces and grout lines. A large format install does not. If the layout starts in the wrong place, the room ends with a 2-inch sliver against the back wall and a 1-inch sliver under the vanity. That sliver is permanent. A real installer dry-lays the entire floor in chalk before any thinset goes down, balances the cuts edge to edge and front to back, and adjusts the starting tile so the room is symmetrical. The cheap install starts at one corner and works across. The shore homes we replace at year three usually have the sliver.
What Substrate Prep Costs on a Real Large-Format Job
The honest numbers for a typical Monmouth or Ocean County primary bathroom (around 80 to 120 square feet of floor, plus shower walls):
- Self-leveling underlayment on the floor: $450 to $900 depending on the depth needed. Adds a day to the schedule because the product needs to cure before tile goes down.
- Skim coat or feather finish on shower walls: $200 to $500 if the existing substrate is out of plane. Done on the same day, dries before the next morning.
- Waterproofing membrane (wet areas only): $4 to $7 per square foot installed for a sheet membrane like Schluter Kerdi or a liquid like Laticrete Hydro Ban. Not optional on a shower. We covered the waterproofing question in detail in our shower tile cracking guide.
- Substrate repair if rot or deflection is found: Variable. A real installer flags this before tile is ordered and bills it as a documented change order.
A complete large-format primary bath install in this area (substrate, waterproofing, materials, labor) runs in the range we covered in our bathroom remodel cost guide. The substrate prep is a meaningful share of that number. Skipping it is how the bid comes in 30 percent under the next quote and the failure shows up at year two.
Tools That a Real Large-Format Installer Brings to the Job
Watching what comes off the truck tells you whether the contractor is set up for the work or is going to wing it:
- Large-format wet saw with a 48-inch or longer rail. A standard residential wet saw maxes out at 24 inches. Cutting a 24x48 tile on a 24-inch saw means cutting it in two passes and meeting the cuts in the middle, which never quite lines up. A real installer arrives with a rail saw or a bridge saw that can cut the full 48 inches in one pass.
- Tile leveling system with the right clip size for the tile thickness. Clips come in 1/16 inch, 1/8 inch, and other gauges to match the joint width and the tile body thickness. The installer should have the right size on hand, not the size that was in the bin from the last job.
- Tile suction cups or a lifting frame. A 30x60 porcelain panel weighs 35 to 50 pounds. Two installers carrying it with bare hands is how the corner cracks before it is set. A real crew uses suction cups or a frame.
- 1/2 inch square-notch trowel and a margin trowel for backbuttering. The 1/4 inch V-notch that comes in the homeowner's toolbox is not the right tool. Notch size has to match the format, and backbuttering needs a smaller flat trowel for the skim coat.
- 4-foot and 6-foot levels. Plus an 8-foot straightedge. The installer should be checking the substrate before tile goes down and the field of tile as they go.
If the truck is set up only for 12x12 work, the install is going to suffer. We have walked into job sites mid-install where the contractor was trying to cut 24x48 tile on a 24-inch saw and the homeowner had no idea this was a problem until we pointed it out.
Where Large Format Tile Makes Sense in a Shore Home
Not every room is improved by going large. The format has a sweet spot:
- Primary bathroom floors. The most common use. 24x48 on a 100 square foot floor reads as continuous and quiets the room. Smaller bathrooms (under 50 square feet) can also benefit but the cuts become a higher share of the work.
- Shower walls. 30x60 or 24x48 on shower walls reduces grout lines to two or three vertical seams. Less grout means less maintenance and a cleaner look. The waterproofing has to be flawless because failures cannot hide behind a busy grout pattern.
- Kitchen feature walls and backsplashes. Slab-look porcelain as a backsplash in a Spring Lake kitchen or a Sea Girt bar reads as natural stone at a fraction of the cost. The format choice depends on the wall size: 30x60 for full slabs behind the cooktop, 24x48 for a continuous run.
- Fireplaces. A floor-to-ceiling slab tile fireplace surround is hard to top visually and easier to install than book-matched marble. The format is forgiving on a vertical fireplace where flatness is easier to control.
- Open-plan main floors. 24x48 across an open kitchen and dining area in a new-build or major remodel produces a quiet, modern floor. Requires the most careful substrate work because the deflection across 30 to 40 feet of floor matters.
- Outdoor patios with rated porcelain. Covered in our outdoor shore patio tile guide. Large format works outside if the porcelain is rated for it and the substrate is dead flat.
Where it makes less sense: tiny bathrooms where every tile gets cut, kitchen floors with lots of cabinets and obstacles, and bathrooms where the homeowner wants a busy patterned look. The format wants to read as continuous. If the room cannot support that, smaller tile is usually a better choice.
What to Ask Before Hiring an Installer for Large Format Work
If you have read our guide to hiring a tile installer in NJ, you know the baseline vetting questions. For large-format work specifically, add these four:
- "How many large-format jobs have you completed in the last 12 months, and can I see three?" Recent and specific. If the answer is "we do them sometimes," the installer is not set up for the work.
- "What mortar will you use, and is it rated for large and heavy tile?" The answer should be a specific product (Mapei Ultraflex LFT, Laticrete 254 Platinum, Custom MegaLite, or similar). "Whatever thinset" is wrong.
- "How will you check substrate flatness, and what is your remediation plan if it is out of spec?" The honest answer is a long straightedge, a self-leveling underlayment plan, and a documented upcharge if it is needed. The wrong answer is "we will work with what is there."
- "What leveling system do you use, and how does it adjust for tile thickness?" If the installer does not use a leveling system on large format, walk. There is no version of this install that produces a good result without one.
The answers do not need to be perfect. They need to be specific. A real large-format installer will rattle these off without thinking. A general remodeler trying to add large-format work to the menu will be vague, and the install will reflect that.
How JL Tile & Stone Handles Large Format Installs
We do large-format work as a primary part of the business, not an add-on. The trucks carry a 60-inch rail saw, leveling systems in three clip sizes, suction lifting frames, and LHT mortar appropriate to the tile body. Substrate gets checked with a 6-foot straightedge before any tile is set, and self-leveling underlayment is a line item on the quote when the floor needs it. Shower waterproofing is Schluter Kerdi or Laticrete Hydro Ban depending on the geometry. Workmanship warranty is in writing on the contract for five years on residential installs in Monmouth and Ocean County, the only two counties we work in.
If you are planning a primary bath, kitchen, or fireplace project in the shore area and want a real quote on large-format work, reach out for a site visit. We will look at the substrate, talk through the layout, and tell you honestly whether the format you have in mind is the right call for the room.