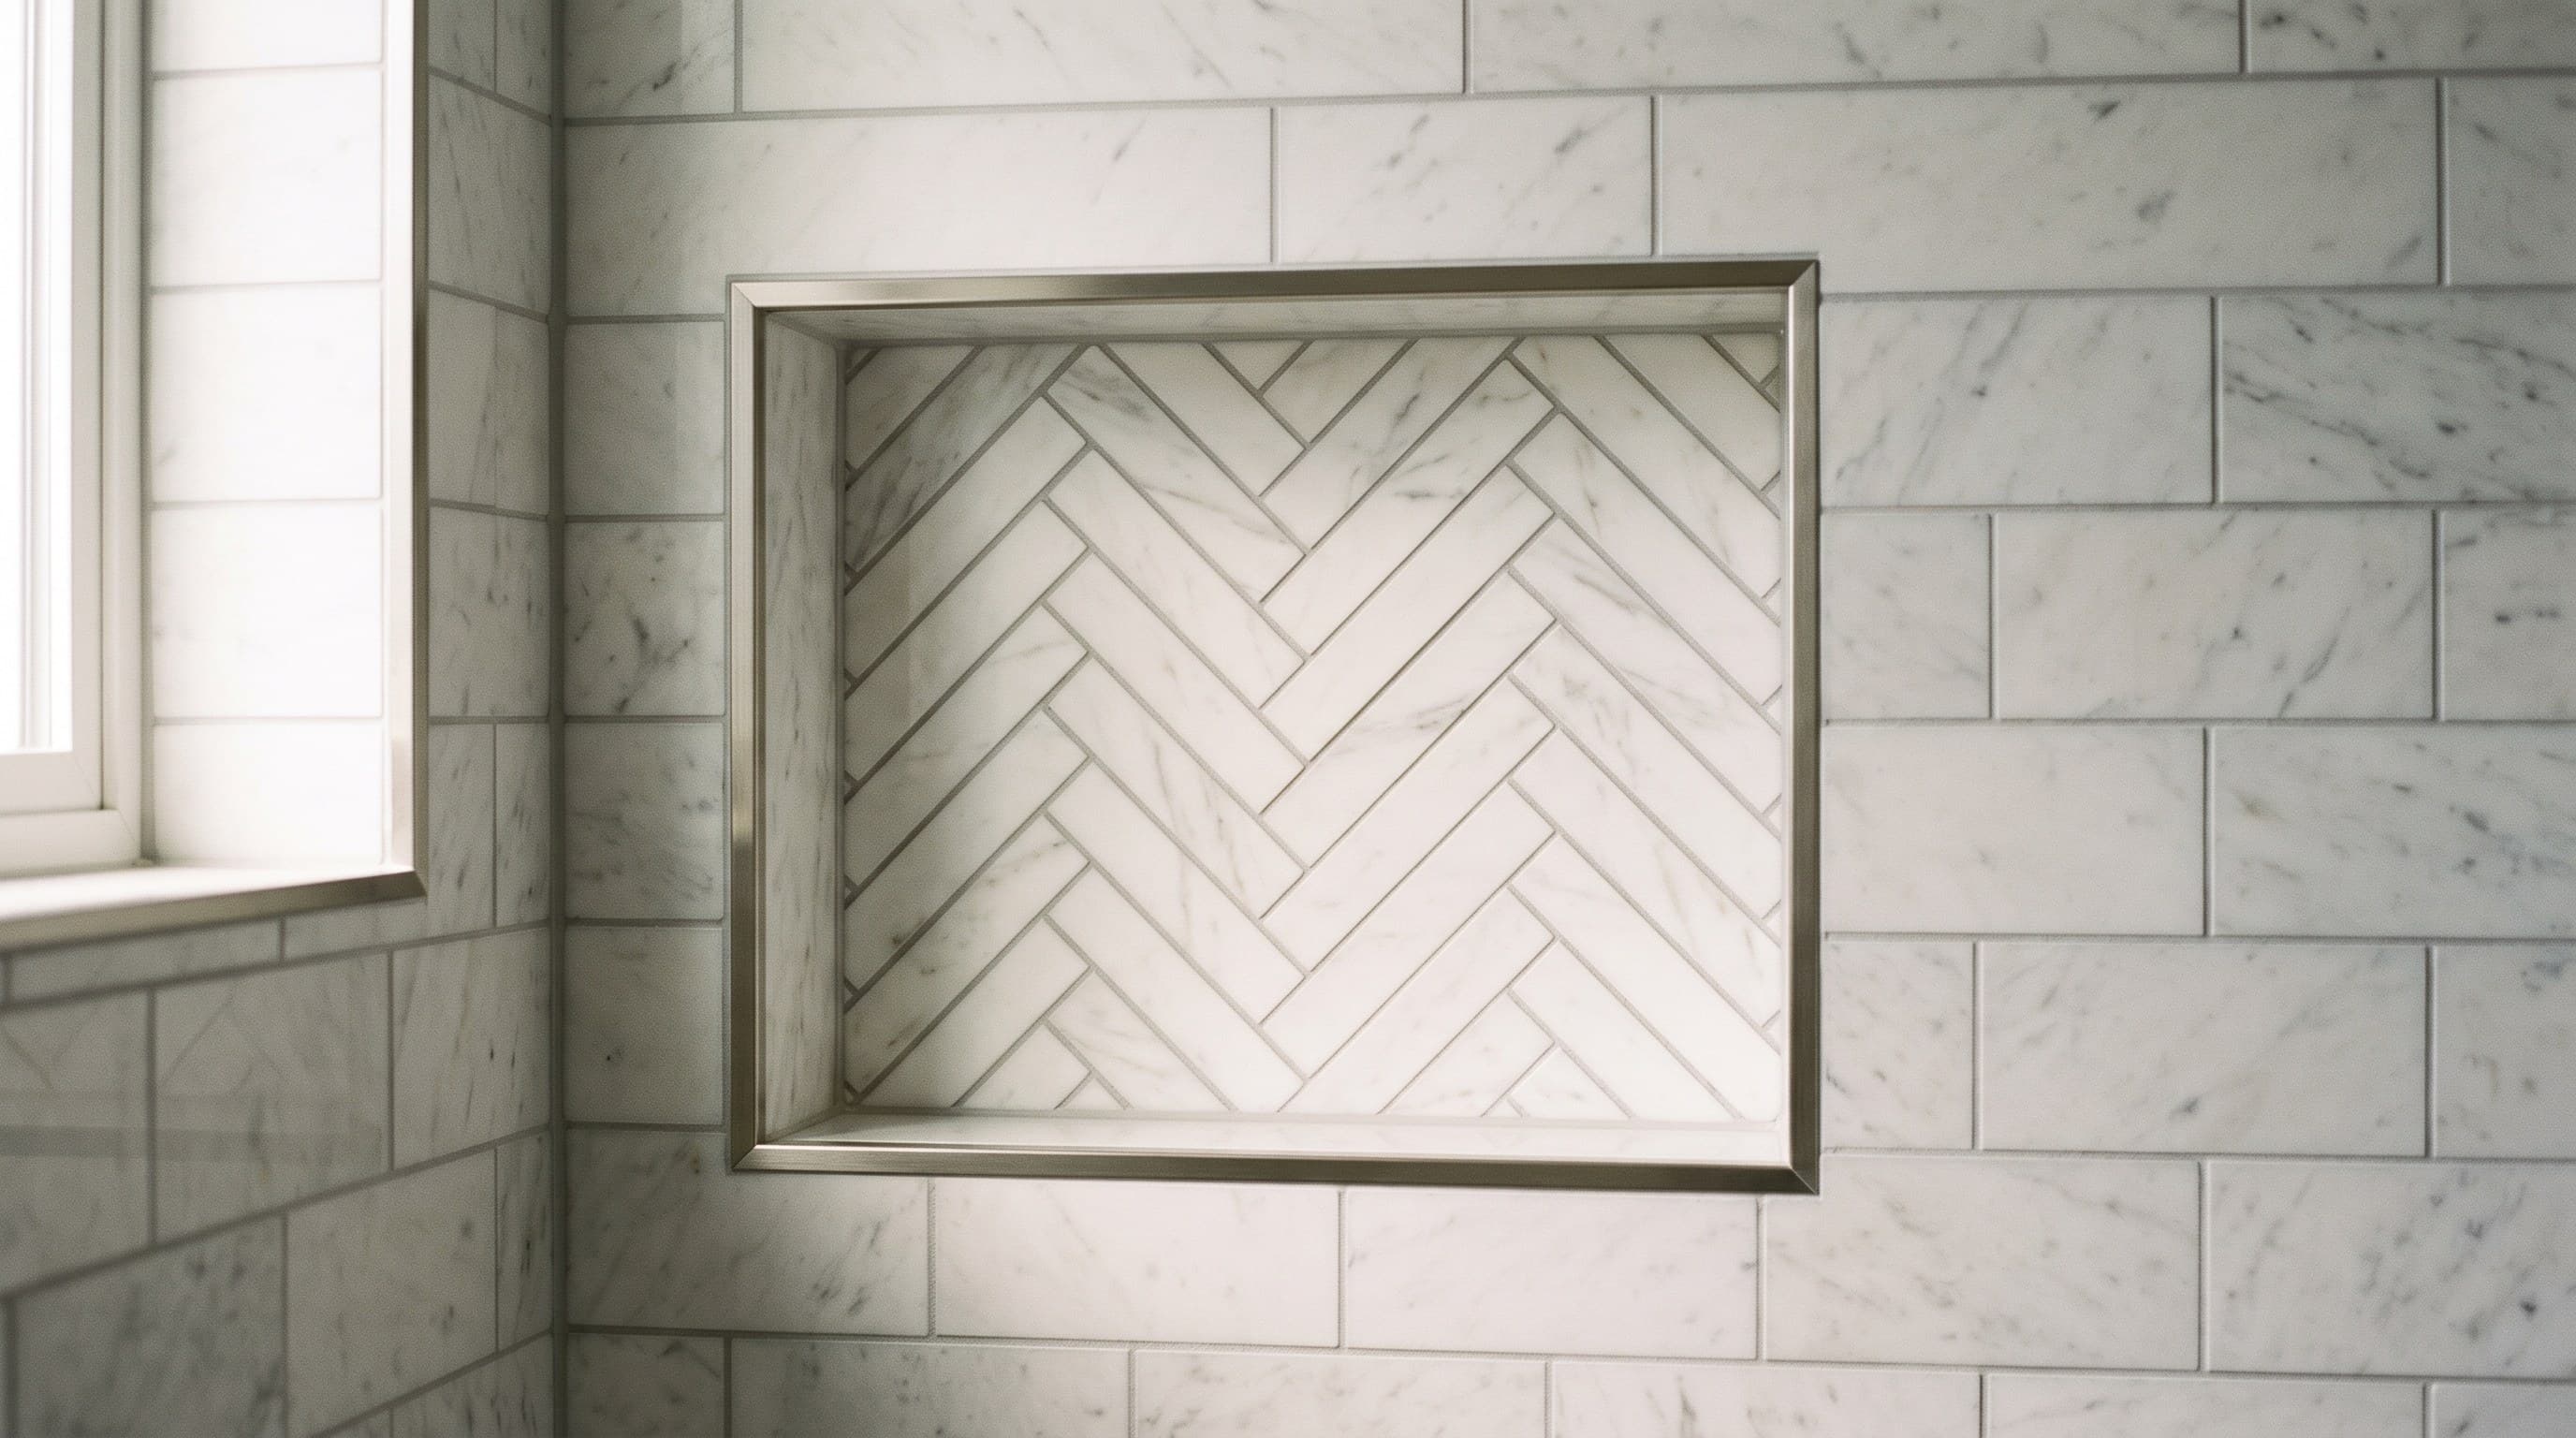
Walk the job in daylight before you release the last payment and check six things: the layout, the grout joints, the inside corners, the trim, the cuts around anything that comes through the wall, and the surface itself for haze. Flatness and waterproofing are their own checks and we cover them separately. Everything on this list you can see standing up, with a phone flashlight and about 20 minutes, and none of it needs you to know anything about tile. Updated October 2026.
The question we get is almost never "is this bad." It's "is this normal, or am I being difficult." Most people asking it are standing in a finished bathroom that looks mostly great, holding an invoice, with one thing bothering them that they can't name. So here is the list we'd walk ourselves, including the places where the installer is right and you should let it go.
Two checks are not on it. Whether the tile edges sit flush is covered in how much lippage is acceptable, which also explains when to hold the final payment over it. Whether the shower pan was proven before tile is in the flood test post. If either of those is your worry, start there.
Stand in the doorway and look at the layout
Before you get close to anything, stand where you'll stand every morning and look. This is the first thing we check on our own jobs, because it's the one mistake that can't be fixed later. A good layout is planned from what you see first, and on most bathrooms that is the shower wall, the niche or the vanity wall. The cuts at both ends of a wall should be roughly the same size, so the pattern looks centred rather than started from one corner and allowed to run out wherever it ran out.
The thing to look for is slivers. A thin strip of tile, a third of a tile or less (on a 12 by 24 wall tile, anything under about 4 inches), at a visible edge or in the middle of a wall means nobody planned where the cuts would land. Behind the toilet or under the vanity toe kick, nobody cares. At the top of the shower wall or around the niche, you will see it every day.
Pattern work makes this easier to judge. The Red Bank bath in our portfolio has a herringbone niche, and a herringbone niche is a layout test you can grade from across the room. If the V doesn't sit in the middle of the opening, the layout was off before the first tile went up, and no amount of grout fixes it.
Sight down the grout joints
Put your eye close to the wall at one end and look along a grout line toward the other. It should run straight. A line that drifts, or steps over by a joint width halfway across the wall, means the rows were not kept true as they went up.
Then compare joint width. The joints in the field should match the joints at the edges and around the cuts. On mosaics, check whether you can see where one sheet ended and the next began. If the seams between sheets read as a grid on top of the pattern, the sheets went down as units and were never adjusted.
Where the installer is right: handmade and glazed tile is not perfectly square, and good setters let the joint width move a little to keep the lines straight. Straight lines with slightly uneven joints is the correct trade. Even joints with wandering lines is the wrong one.
Inside corners should be caulked, not grouted
This is the one homeowners most often get backwards. Where the wall meets the floor, where two walls meet in a shower corner, and where tile meets a tub, the joint should be a flexible sealant in a colour that matches the grout. The tile industry's own method for this, EJ171 in the TCNA Handbook, puts a movement joint at every change of plane, because the two surfaces move independently and hard grout in that joint will crack.
So if you see what looks like caulk in your corners, that is not a lazy shortcut. It is the right detail. What you're checking is that it is there, that it is continuous, and that it is neat. A corner grouted solid usually looks fine at handover and shows a hairline crack by the first winter.
Check the trim and every place the tile stops
Run your hand along the edges where tile ends: the outside corners of a wall, the edge of a niche, the top of a wainscot, the line where the floor tile meets the hallway. Metal edge trim should meet itself at clean corners with no gap and no sharp burr. Bullnose should be continuous, and its corners finished, not left as two flat ends butting into each other.
Look inside the niche too. The tile should wrap the opening without a raw cut edge showing, and the sill should pitch slightly toward the shower so water doesn't sit on it. A niche shelf that holds a puddle is a detail someone skipped.
Where the installer is right: the same rule applies on a backsplash. Where tile meets the countertop is a change of plane, so a neat bead of sealant there is correct work, not a patch over a gap. The floral mosaic on marble in our Manasquan backsplash is the kind of pattern where the cuts at that line are the first thing your eye goes to, so judge them as closely as the corners.
Look at every cut around a pipe or a box
Cuts around the shower valve, outlets, switches, the toilet flange and the tub spout are where rushed work shows. Cut edges should be smooth, and the hole should be close enough that the cover plate, escutcheon or trim ring covers it completely with a little room to spare. If you can see a chipped edge or a gap sticking out past the plate, it will always be visible.
Take the outlet covers off if they're already on and look. It takes a screwdriver and 30 seconds, and it's the most honest view of how careful the cutting was across the whole job.
Use a flashlight for haze
Hold your phone light low against the surface and look across it, not at it. Cement grout leaves a dull film on the tile face if the cleanup was rushed, and it shows up as a cloudy sheen under raking light. A light haze in the first days is normal and comes off with a proper cleaner. A heavy film that has been left to cure, or any haze on epoxy grout, is much harder to remove and is the installer's job to deal with before you pay.
Photograph it, then talk
Before the last payment clears, take photos of every wall, both corners of the shower, the niche, the cuts and the transition at the door, in daylight. If something is off, walk the installer to it and ask what they'd do. When a homeowner does that with us, we'd rather hear it at the walkthrough than in a review. Caulk, haze, a cover plate and a lifted piece of trim are all fixable in an afternoon. A layout full of slivers or wandering grout lines is not fixable without taking tile off the wall, and that is the conversation to have before the money moves, not after.
If you are still choosing someone rather than checking their work, how to hire a tile installer is the better place to start, and if a piece sounds hollow when you tap it, that has its own answers in hollow-sounding tile.